What’s included in the SQ infusion kit
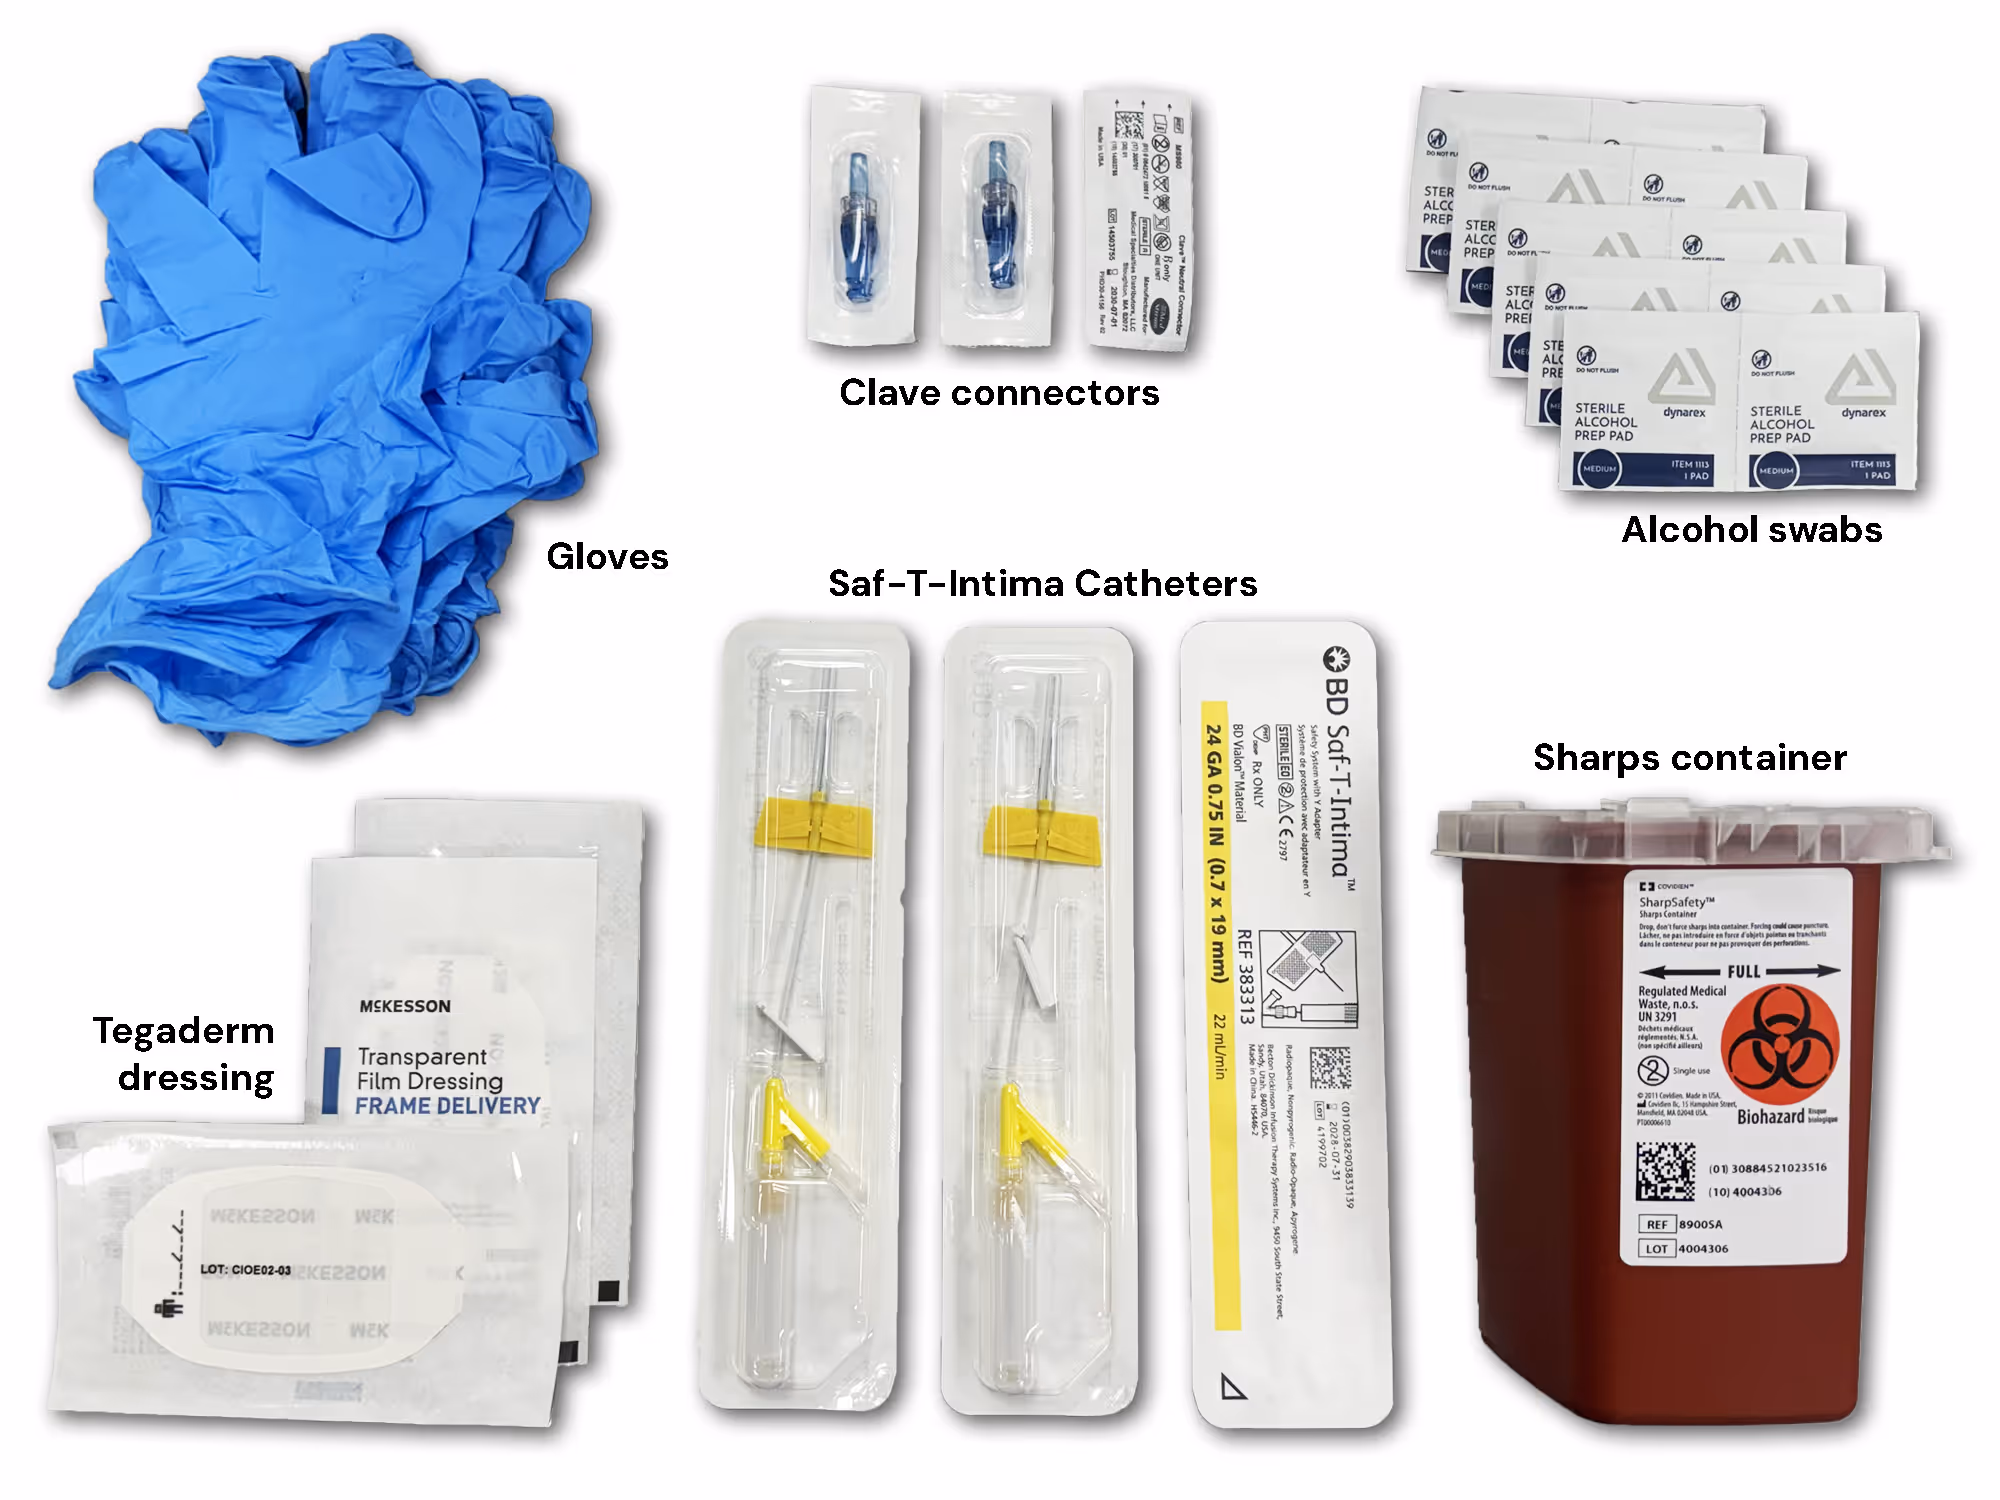
Each kit provides the essential components needed to start and maintain a subcutaneous infusion site:
- Gloves (8 Medium)
- Alcohol Swabs (10)
- Saf-T-Intima 24G ¾" SQ Catheters (3)
- Clave Needle-Free Connectors (3)
- Tegaderm Dressings (3)
These supplies support both single-site and repeated-site access depending on the patient’s care plan.
Preparing for the infusion
Proper preparation helps maintain comfort and reduce infection risk. Begin by performing hand hygiene using soap and water or an alcohol-based hand sanitizer. Gather all kit components and place them on a clean, dry work surface, ensuring the packaging is sealed and sterile.
Put on clean, non-sterile gloves. Identify the infusion site—common locations include the abdomen, thighs, and upper arms. Rotate sites regularly to reduce irritation. Cleanse the chosen area with an alcohol swab using outward circular motions and allow it to dry completely.
Inserting the SQ catheter
These steps ensure correct placement and a secure access point for infusion.
Open the Saf-T-Intima catheter packaging without touching the catheter tip. If instructed by the prescriber, prime the catheter with saline or medication. Hold the skin gently taut and insert the catheter at a 30–45° angle. Advance the flexible catheter fully under the skin, then retract the introducer needle, leaving only the soft catheter in place.
Attach a Clave needle-free connector to create a closed system. Apply a Tegaderm dressing to secure the catheter and protect the insertion site.
Starting the infusion
Once the catheter is in place, you can begin administering medication.
If tubing is required, attach it firmly to the Clave connector. Prime the tubing by flushing with medication or carrier solution to remove air. Begin the infusion, ensuring the prescribed rate and duration are followed. If using a CADD pump, verify the pump settings match the medication order.
Monitor the site regularly for:
- Redness or swelling
- Burning or pain
- Leakage
- Signs of infiltration
If any concerns arise, pause the infusion and notify hospice.
Post-infusion care
When the infusion is complete, turn off or pause the pump and clamp the tubing. Disconnect the tubing from the catheter. Gently remove the SQ catheter and dispose of supplies properly.
- Sharps → Sharps container
- All other items → Trash or biohazard waste per agency policy
Assess the site for redness, tenderness, swelling, or drainage that could indicate irritation or infection.
Additional guidance
Rotate infusion sites regularly to prevent skin breakdown or irritation. If multiple sites are used, repeat all preparation and insertion steps for each location. For continuous infusions, SQ sites are typically replaced every 3–7 days depending on site tolerance and hospice protocol.
Always follow the prescriber’s medication order and your hospice agency’s clinical guidelines.